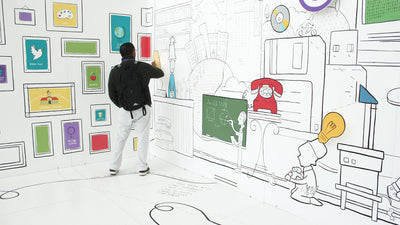
Make Sound - An Interactive Mural

We love it when delivers content beyond our friends’ photo timelines and really comes into its own as a source for discovering , and brands. This is how we found this project made with the Touch Board.
We got in touch and caught up with the creators, Stephen Nixon and Andrew Tracy from One Thousand Birds to find out more about the project concept, their interests and their working process.
Can you tell us a little bit about yourself? What is your job and background, what kind of projects or clients do you focus on?
Andrew: We’re a commercial sound company. We specialise in all aspects of post audio, mostly for commercial projects but also for documentaries and films.
Stephen: I’m a product designer for software and apps at IBM, and I spend most of my time working with a team to productive user interfaces for screens. Outside of that, I’m also obsessed with type and lettering, as well as brand identity.
Can you tell us a bit about the idea behind this project?
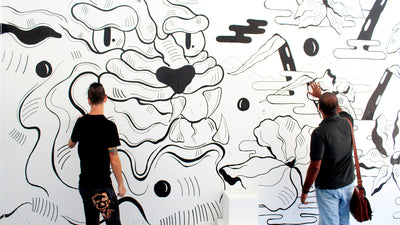
A: Stephen came to us with the idea of an interactive mural at our Brooklyn studio. We were totally thrilled with the idea. We had also been working on some projects featuring capacitive sensing. Our former interns, Torin Geller and Matt Lau had each been working on cap sensing installations, so when we started talking about the mural it was only natural that we wanted it to be an piece.
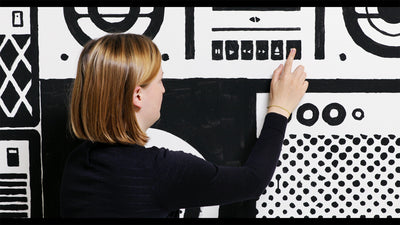
S: I’ve done a lot of lettering for small projects (T-shirts, posters, projects, posts), but it was a personal goal to do something physically larger – I really admire sign painters and who are able to craft their messages at a massive scale. I’ve been a big fan of One Thousand Birds because of the concerts they host in their East Williamsburg studio, so I asked whether they might have a wall where we could a mural. Talking with some friends at the studio, the idea came up to use conductive paint markers to make the mural into an instrument. It seemed crazy at first, but it was too cool an idea to pass up. OTB had just made a “laser harp” out of a metal frame and motion-detecting lasers, so I realised that with the right mural and materials, it might be possible to extend the idea onto a wall.
As you’ve experimented with conductive paint, what did you find most interesting and challenging about this material?
A: Conductive paint is really thick. That was really the most challenging part of working with it. The other challenge was working on such a large scale we originally envisioned the circuits together but as we got larger we realised that we would need to use wires to connect the letters back to the boards. We would love to make some large scale murals without using wires or making them invisible. The capabilities that the conductive paint offers for are endless.
S: We mixed our own from graphite and acrylic paint, so it was super goopy! It felt like with tar. However, this gave it a really cool, sandpaper-like texture, which was really unique and beautiful. It was somewhat tricky to get all of the paint surface to be conductive enough, but once Torin and Matt at OTB dialled it in, it was totally magical. I was very glad to have some extra technical help on the project.
How did you come across the Touch Board and why did you decide to use it in your project?
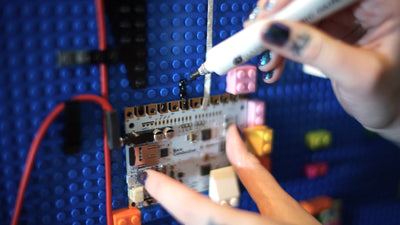
A: A friend recommended it. We had been building our cap sensing projects with Arduino, but the coding was pretty intensive and they weren’t always reliable. When we saw the Touch Board it just made sense. We wanted the mural to work reliably without any extra coding or headaches and it really has. We just turn it on and it works.
S: I knew we needed some way to process the signals, and I was hoping to avoid needing a full laptop to run the mural. I think I found the boards because I was first researching Bare Conductive paint. It seemed like a perfect solution.
What was the most difficult part of the project and what solutions did you devise to overcome it?
A: We had some issues with the size. When we finally wired it up and turned everything on we had a couple of letters that should have been working but weren’t. We finally realised it was a threshold issue, probably having to do with the scale of the project. We adjusted the threshold a bit in the code and everything has been working great since.
S: I know it took some doing to make the conductivity and sounds work how we wanted it to, but from a aspect, my main challenge was making a mural that would serve three distinct purposes: 1) represent OTB, 2) look awesome as a mural, and 3) use spatially-separate sections of letters to make a workable and intuitive interface as an instrument.
What programs (if any) did you use to and trace the letters?
A: I’ll leave that one for Stephen to answer. He did some beautiful hand lettering then digitised and projected it for tracing.
S: I start out every on paper, and make some mid-fidelity sketches so my client/collaborator can see what I’m thinking and respond. This back and forth helps find the right idea and expression of it. From there, I tend to use Glyphs (an app for type/font ) to draw the letters, and then do experimentation with extra shapes and colours in Illustrator, Photoshop, and on paper. After lots of iteration, we had something we were all excited about, and I simply used a projector and pencil to trace the letters from my laptop screen onto the wall. From there, it was pretty simple to paint the letters with conductive paint, then freehand the birds with gold paint, loosely based on some sketches I had done in advance.
How did you find the of using the Touch Board? Did you encounter any obstacles when you were trying to connect the painted letters to the PCB?
A: We had a bit of trouble trying to solder onto the board. It took a few tries to get it to stick. We also were hoping for polyphonic audio, so had to compromise a bit with the midi synth.
S: OTB took on the part of the project, and ended up making it work in a really cool way. I think they might try to find a way to make it play multiple audio samples at a time to give it even more depth. However, as someone who just does music as a hobby, I find it really fun even with the standard set of polyphonic MIDI sounds.
Any plans for using the Touch Board or Electric Paint in any future projects?
A: We love the reliability of the board and would absolutely use it again, but as a sound company we really need the ability to playback audio samples polyphonically. We may use it again if making a synth-based project.
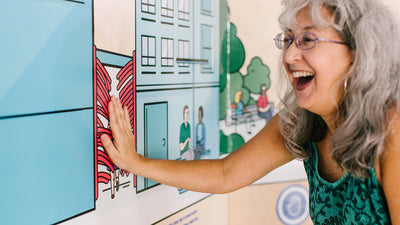
S: I’m definitely hoping to! It’s very rewarding; when I visit OTB for events, there’s always some new people playing with the mural and having fun making sound. As a designer, it’s an awesome feeling when people like and use what you’ve helped , so I’ll probably keep pushing the medium to see what else can come from it.
For those of you looking to interactive walls and , you’ll be excited to hear that the Interactive Wall Kit just launched! If you're also looking for , we've a tutorial with the top interactive art projects.
Photo credits: Stephen Nixon and Andrew Tracy
Video credits: Adam Gundersheimer
We love it when you share your projects! Post your project on Instagram, YouTube, or Twitter, and make sure to tag @bareconductive or use #bareconductive. You can also send your videos and photos to info@bareconductive.com so we can post them on our site for the world to see.