Make A Basic Capacitive Sensor For An Arduino Board With Electric Paint

Build simple touch and proximity interaction into your project
Capacitive sensing is a great way to create touch and distance sensing interfaces that are easy to integrate into a wide variety of projects.
Capacitive sensing detects changes in the local electric field. These changes are detected as a touch event and can be mapped in software to endless functions.
We're such big fans of capacitive sensing that we made our Touch Board make capacitive sensing with Electric Paint super easy and ultra-reliable.
But you don't need a Touch Board to create a basic capacitive sensor. All you need is a pad of Electric Paint, an Arduino, and a resistor. When correctly constructed, this sensor can detect a person's presence from up to 300 mm away and can work behind any non-conductive material, such as glass, wood, plastic, etc. By changing the resistor value and the Electric Paint pad's size, you can create either a touch sensor or a variable proximity sensor.
Credit for the CapSense Library goes to Paul Badger. Thanks for making this so easy to implement. We just modified it a bit :).
We love it when you share your projects! Post your project on Instagram, YouTube, or Twitter, and make sure to tag @bareconductive or use #bareconductive. You can also send your videos and photos to info@bareconductive.com so we can post them on our site for the world to see.
You will need:
- 1 x Electric Paint 10ml
- 1 x Arduino Uno or equivalent
- 1 x USB cable appropriate to your Arduino
- 1 x 1MΩ resistor
- 1 x Breadboard
- Jumper wires
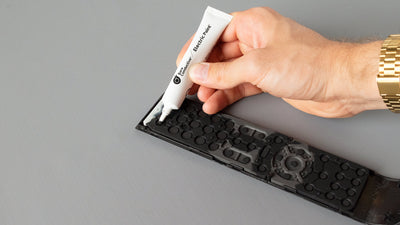
Step 1 Paint your Sensor
First, you need to paint your sensor with Electric Paint. Try to make it approximately the size of your hand to start. The outer shape isn't important, but the total amount of Electric Paint is. Too big, and it may be too unstable, too small, and it might not work. You can try painting a few different designs to compare their performance. You can paint it on any non-conductive surface, like the paper we used here. Leave your sensor pad to dry.

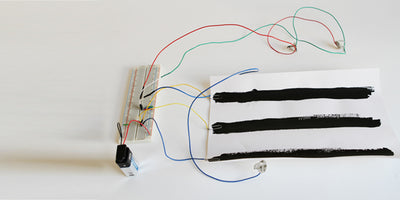
Step 2 Build the Circuit
While the paint is drying, you can build your circuit with your Arduino, a breadboard, some wires, and a large resistor. We used an Arduino Uno and a 1MΩ resistor. Connect the resistor between pin 4 and pin 2. Pin 4 is referred to as the "Sensor Pin," and Pin 2 is referred to as the "Receive Pin."
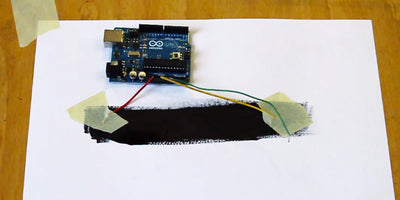
Step 3 Connect to the Electric Paint
Once you have your circuit built, you can connect it to the pad of Electric Paint. We used a crocodile clip and trimmed it to connect it to the paint. Connect the other end to pin 2 on the breadboard.
Step 4 Upload the Code
First, you need to install Arduino's CapSense library. If you currently have your Arduino IDE open, close it first. Download the library and move it to the library folder of your Arduino folder. Reopen Arduino and install the library via
Sketch→Import Library
Now it's time to upload the sketch. You can download it here. Open it, Arduino will ask you to move it, to which you can reply "Yes". Connect your Arduino Uno to the computer and upload the sketch.
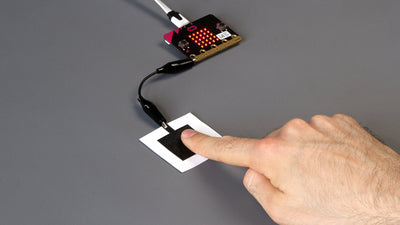
Step 5 Test the Sensor
Open the Serial Monitor of Arduino. You should see a constant stream of numbers. Hover your hand over the sensor, and you see the numbers changing! This output is your sensor at work, displaying the current measurement. Touch the pad to see the largest change!
Step 6 Next steps
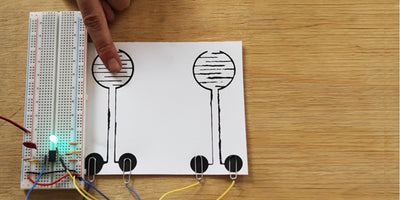
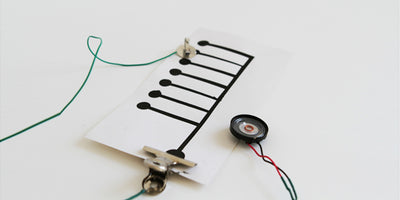
Now you have explored capacitive touch and proximity sensing, you can design your very own touch sensor and proximity sensors. The sensors do not need to be square. Experiment with your own designs and see how this impacts the sensitivity of the system. Proximity sensing is also quite dependent on the design of the sensor. We have written our design rules for creating a sensor here and the Printed Sensors are ideal for proximity sensing.
Capacitive sensing with the Arduino is very limited. The capacitive sensor is easily influenced by electrical noise and changes in the environment, such as humidity. To adjust the sensor requires constant calibration. We designed the Touch Board to solve these problems and create stable, easy-to-implement capacitive sensors. So if you are struggling to get the results you need from this tutorial, make sure to check out our Touch Board.