Create an Interactive Poster and Tell a Story With Your Own Sounds

Make an interactive poster with the Touch Board and Electric Paint and add sounds and recordings to your story or presentation!
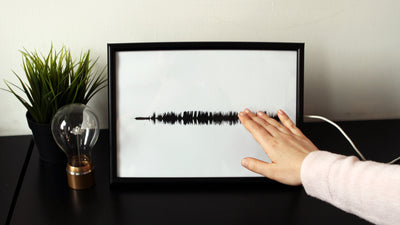
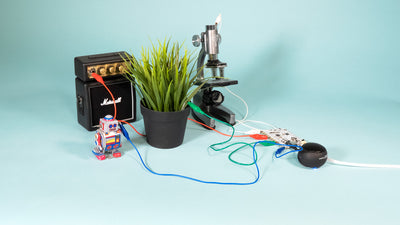
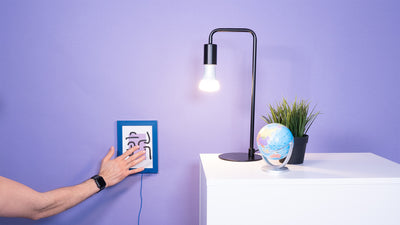
Together with Electric Paint and the Touch Board, you can very quickly create interactive sound posters: touch the paint and trigger a sound! You can use this poster to create an interactive presentation to a topic of your liking.
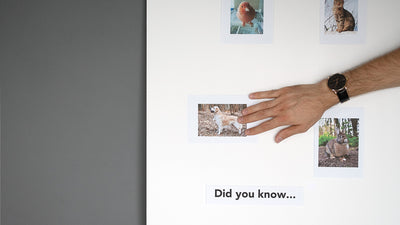
The topic that we're going for is "renewable energy and the impact on our every day life", so we're depicting a wind turbine, electric car and assemble them in our house. This is just an example topic, you can go for any topic that you like.
We love it when you share your projects! Post your project on Instagram, YouTube, or Twitter, and make sure to tag @bareconductive or use #bareconductive. You can also send your videos and photos to info@bareconductive.com so we can post them on our site for the world to see.
You will need:
1 x Touch Board
1 x Electric Paint 50ml
1 x Electric Paint 10ml
-
A3 card
Brush
Scissors
Speakers / headphones
SD card reader
Removable adhesive, e.g. Blu Tack
Micro USB cable
Computer with internet
Plan your design
The first step is to think about what you want the poster to entail and what story you want to tell. This can be anything you want, the choice is yours! Our example topic is about "renewable energy and the impact on our every day life" so we want to depict objects that are relevant to this topic.
Paint your sensors
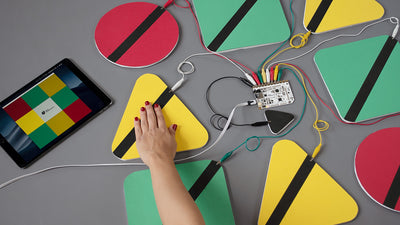
First, we need to paint your sensors with Electric Paint and paint the lines that run down to the Touch Board. For this we use card. There are two things to consider:
- Make sure each sensor and line painted with Electric Paint doesn't cross with another sensor and line
- Don't paint lines that are too long, keep them as short as possible
You can either just go ahead and paint directly, use a stencil, or draw something first and then fill the drawing with Electric Paint, the choice is yours.
We provide a sample print out of the pitch of the electrodes that you can download here. You can use this pitch and then draw from the circles to paint your sensors.
If you want to use or print our sample design, you can download it here.
If you have access to a stencil cutter, you could also try making a stencil with your sensor, we have more instructions about that here.
When you have painted your sensors, leave the paint to dry.
Connect the Touch Board to the Electric Paint
Disconnect everything, including power from the Touch Board. We want to make sure that the board is attached securely, for which you can use removable adhesives, such as Blu Tack.
Once the paint has dried, align your Touch Board over the lines of Electric Paint. Then, using the tube, fill the electrodes with Electric Paint. Once this paint has dried, your board is connected to the paint; you have cold soldered the board onto the paint.
Change the tracks on the SD card
You can use the time of the paint drying to start changing the files on the Touch Board. Take the SD card out of the Touch Board, insert into the microSD card reader and put the reader into your computer/laptop. Open the SD card and you should see a couple of files, including TRACK000.mp3, TRACK001.mp3, etc. up to TRACK011.mp3. These are the files that are played when you touch the corresponding electrode, so when you touch electrode 0 on the Touch Board, it plays TRACK000.mp3 and when you touch electrode 11 on the Touch Board, it plays TRACK011.mp3.
You can change the tracks to any MP3 files that you can find. So this could be songs, sounds or a voice recording. Make sure use the same naming structure.
With your files uploaded to the SD card, eject the SD card and reinsert into the Touch Board. Give the sounds a test, by powering the Touch Board, adding audio and touching the electrodes!
If you want to find these instructions about how to change the MP3 files, have a look at this tutorial here.
Power on and touch the paint
With your new sounds on the SD card, connect the board to power and turn the Touch Board on. Try touching your various sensors, it should play your sounds!
If it doesn't, there might be a couple of reasons why, check against this list for each sensor:
- Enough paint: Is there enough paint from the Touch Board to the sensor? Is there paint somewhere applied to sparingly? Did it crack somewhere?
- Cold solder: Is there enough paint in the electrodes of the Touch Board?
Decorate your poster
Your interactive poster is nearly ready! Now it's time to add your final touches. This is where you can let your creativity run free. We have a sample house that you can download here, print out, cut and add over the sensors.