Make a Bookcase Light with the Light Up Board

This is a simple tutorial explaining how to make a bookcase light using the Light Up Board, Electric Paint and masking tape. In the end, you will have a handy light that you can use to light up your bookcase. Of course, you can use this light elsewhere. We will show you how to make a large switch with masking tape and Electric Paint, which is practical when you can't see the switch in darker conditions.
We love it when you share your projects! Post your project on Instagram, YouTube, or Twitter, and make sure to tag @bareconductive or use #bareconductive. You can also send your videos and photos to info@bareconductive.com so we can post them on our site for the world to see.
You will need:
Light Up Board
Electric Paint 10ml
Electric Paint 50ml
-
USB cable
masking tape
paper
brush
cutting knife
cutting matt
Make your switch
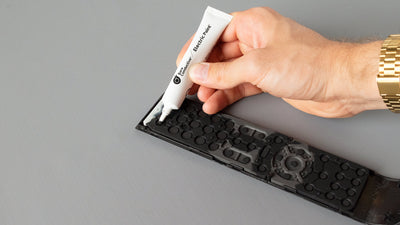
First, you are going to create the switch for the bookcase light with masking tape and Electric Paint. Stick some masking tape to a piece of cardboard. Then, cover the tape with Electric Paint by painting the surface. Wait until it is dry. Due to the moisture of masking tape, it might take longer for the paint to fully dry.

Create lamp base
Next, create your lamp base. In our template, we have drawn lines for the connections and marked where the tape is going to be applied. If you are making your own, have a look at this tutorial here to find out how. For this project, we are using electrodes E0, E9, and E10. E0 connects to the switch, while E9 and E10 connect together.


Apply Electric Paint and twist in the Light Up Board
Fill out the lines on your lamp base with Electric Paint and wait for the paint to dry. Once the paint has dried, you can twist the Light Up Board into the paper. If you haven't twisted the Light Up Board into paper before, then check out this tutorial here.
When all the Electric Paint has dried, it's time to add the switch you made earlier with the masking tape. Stick it down just next to the connection to electrode E0. When you're done, cold solder the board and the connection to the masking tape. Wait for the paint to dry.

Power it up
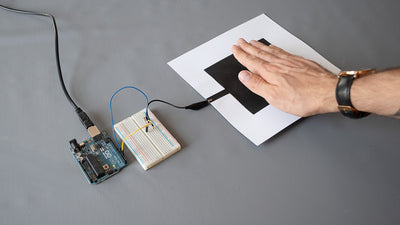
When all the paint has dried, plug the USB cable into the Light Up Board and touch the switch to turn the light on. You can power the light via power bank if you would like a portable and simple solution. Congratulations, you made your own bookcase light!
You can now attach it to your bookcase or anywhere else you need extra lighting, for example, underneath a table or inside a drawer. You also might want to seal the Electric paint switch to prevent smudging, see this tutorial here for more details.