How To Use Shielded Cable With The Touch Board

Increase sensor performance and reliability for the Touch Board with shielded cable
In most cables, plastic or insulating material covers the central wire, protecting it mechanically but not from electrical interference. In shielded cables, an extra layer of metal shield surrounds the conductive wire or wires inside. As the name implies, shielded cables minimize interference and reduce the sensitivity of the cables. The difference between a shielded and unshielded cable can make the difference in reliability for an ambitious Touch Board project, such as a large interactive wall.
In this tutorial, we explain how to solder the shielded cable to the Touch Board Proto Shield, so to use this cable, you need to have the ability to solder. You can solder directly to the Touch Board, but it's a bit trickier as the board doesn't have as many soldering points as the Proto Shield.
Our Interactive Wall Kit has specially designed hardware and carefully selected cables to maximize sensor performance. But it is possible to achieve many of the benefits of the Interactive Wall Kit with a Touch Board and commercially available shielded cable if you are willing to put in the work.
Before we jump into the tutorial, let's take a closer look at why a shielded cable would create a more stable and reliable installation.
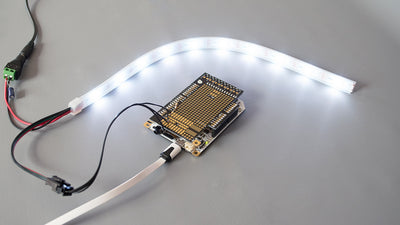
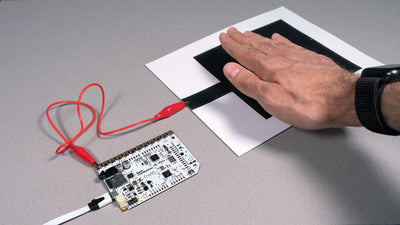
For example, let's imagine connecting a Touch Board to a painted pad of Electric Paint with a long crocodile clip wire. As an unshielded cable, the crocodile clip wire is not protected by anything other than by an insulative plastic jacket. This plastic jacket protects the wire from scratching and corrosion but not from interference generated by electrical fields. This could create a problem in some projects as Touch Board uses capacitive sensing to transform Electric Paint pads into sensors.
Capacitive sensing relies on generating a carefully controlled electrical field. If you're using a crocodile clip wire to connect between the Touch Board and your Electric Paint, as in our example here, the wire itself becomes part of the sensor. Without electrical shielding, the wire produces an electrical field that you can interact with. In short, touching the crocodile clip wire might trigger an event on your Touch Board. Probably not what you want. So what do you do if you want to run a long wire between your Touch Board and your Electric Paint pad? This is where shielded cable comes in. The shielded cable will focus your sensor signal only on your Electric Paint pad, making the wire impervious to false triggers from touches or other electrical equipment. The shielded cable foes this by creating a barrier that separates the electric field surrounding the central conductor from anything outside. Let's look at how to build this useful functionality into a project.
You will need:
1 x Touch Board
—
1 x Length of shielded cable
1 x Soldering iron and solder
Choose which shielded cable to use
There are two different types of cable shield used within shielded cable: foil shielding (foil shield) and braided shielding (braided shield). In this picture, the left-hand cable uses foil, and the right-hand cable uses braid. For our purposes, they both protect equally well, and either should work well for your project.
Within the shielded cable, there is at least one insulated wire – for example, the foil cable on the right has three. Depending on how many electrode connections you want to make to the Touch Board, each of these conductors must be soldered or attached to the Touch Board.
If you look closely, you can also see an uninsulated conductor sticking out of each cable. They are marked with a white arrow. This is the drain connection to the shield, which allows for grounding the foil or the braid. Not every shielded cable has a drain wire, so make sure to get one that does have one. Generally, shielded cables with a thicker inner conductor, with a resistance of around 30 milliohms per meter, perform better. Sourcing shielded cable can be difficult because sometimes the specifications and construction are not well-described. Our best advice is to purchase a few sample lengths from an electronic or hardware distributor and run some tests before committing to a large quantity for your project.
Solder the shielded cable
The most important step is to ground the drain wire of the shielded cable. Solder the drain wire to the ground of the Proto Shield. Insert the conductor into the screw terminal and screw it in place.
On the other end of the cable, you need to attach the conductor wherever you want it to connect to, for example, a crocodile clip. Important: do not solder the drain wire at this end of the cable. Once you have soldered the drain wire and connected your sensor, power up your Touch Board. Your Electric Paint sensor pad should still work, and touching the cable should not produce any response from the Touch Board.
Integrating shielded cable into your project
When you begin to add shielded cable into your project, you should remember a few rules of thumb. The shield adds capacitance to the cable, which decreases sensitivity and diminishes the signal. The longer the cable, the worse this effect gets. If you're trying to detect proximity at the end of a run of shielded cable it's going to be very difficult. As a general rule of thumb, three to five meters is about the most shielded cable that you're likely to be able to use for touch applications.
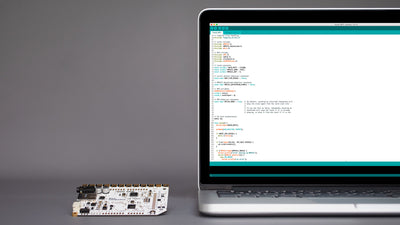
You can test this effect and set up your project with our Grapher tool. Use the Grapher to visualize the sensor. You can then also change the board's sensitivity to max out the performance with your shielded cable. But remember that decreasing the thresholds causes signal interference. The key to building a successful setup with these tips is experimentation and remembering that everything is a compromise. If you're looking for a more robust method, we'd recommend using the Interactive Wall Kit.