How To Connect To IFTTT With The Touch Board

Create a connected sensor to control a wide variety of devices
IFTTT is a great web service to easily integrate technology and to turn objects smart for your smart home. It consists of IFTTT Applets, formally known as an IFTTT Recipe, which is a combination of events and also the namesake of IFTTT: “IF This happens Then That occurs”. In this tutorial, we’re going to use the Touch Board and the Applet is “If electrode 11 of the Touch Board is touched then send a push notification to the smartphone”. An Applet can use a whole range of Services, formally known as an IFTTT Channel, and in this case, we’re using the “Webhook” service and the “Send notification” service.
For this tutorial, you will need in addition to the Touch Board an HC05 Bluetooth module and Processing on your computer. You also need to have an IFTTT account and the IFTTT mobile app on your iOS or Android smartphone. You also need to allow IFTTT to send you notifications on your phone.
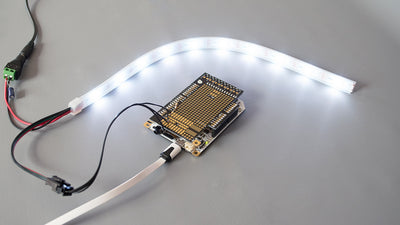
This is a great project for the Touch Board Pro Kit, as it allows you to easily integrate the Bluetooth module into the Proto Shield and it contains the Printed Sensors. We are going to use the Printed Sensor in order to create a smart sensor.
We love it when you share your projects! Post your project on Instagram, YouTube, or Twitter, and make sure to tag @bareconductive or use #bareconductive. You can also send your videos and photos to info@bareconductive.com so we can post them on our site for the world to see.
You will need:
- 1 x Touch Board
- 1 x Suitable Bluetooth shield or module
- 1 x USB Micro B to USB A or USB C (depending on your computer's USB port type)
- 1 x Computer running Mac OS, Windows, or Linux
- 1 x Printed sensor
- 1 x Crocodile clip
Step 1 Add Bluetooth to the Touch Board
First, you need to add Bluetooth to your Touch Board. We provide instructions for the HC-05 module, but you can use other Bluetooth modules too. Make sure that the BAUD rate for the Bluetooth module is set to 9600.
Step 2 Download the Processing sketch
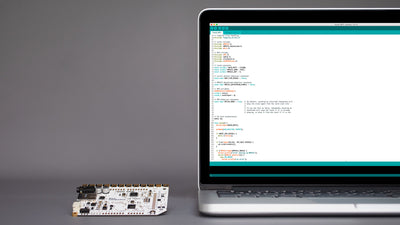
Next, you need to download Processing, if you haven’t installed it yet. Once downloaded, open and close it once so that it generates the necessary files.
Then, download the sketch. Unzip the file and move the folder “touch_board_ifttt” to the corresponding location:
Windows
Libraries\Documents\Processing
or
My Documents\Processing
Mac
Documents/Processing
Linux (Ubuntu)
Home/Processing
Step 3 Install the necessary libraries
With the folder in place, open the file “touch_board_ifttt”. You need to install the http library for this sketch. In Processing, head to
Sketch→Import Library→Add Library…
In the search field, look for “http requests”, select the library and then click “Install”.
Step 4 Edit the sketch and test the connection
In Processing, run the code once. You should see a list of devices in the console window, with one of them being the Bluetooth module that you set-up in Step 1. The list counts from 0, so the first device is assigned number 0, the second one is number 1, and so on. In the code, change the variable device_number in line 10 to correspond to the Touch Board with the Bluetooth.
Run the sketch again and try pressing electrode 11. It should say in the console window that an error occurred, “Message sent” and “Electrode 11 was released”!
Step 5 Create an applet with IFTTT
On your IFTTT account, you now need to head to the IFTTT website and create a new Applet. Search for “webhooks” and select it. Click “Connect”. Click on “Receive a web request”. Give the event a name, for example, “electrode11_touched”, and click “Create”.
Now click on “That” and select “Notifications” from the options. Choose the “Send a notification from the IFTTT app” option, give the event a title and then “Create action”. In the end, click “Finish”. We have now created our own Applet, which will send a push notification to your smartphone.
Step 6 Get the URL and test
In the overview, click on your account and then “My services”, select “webhooks” and then click on “Settings”. This should show you the URL for your webhooks. Open the URL in a new tab and you should now see a new URL where you can enter the event. Enter “electrode11_touched” and copy the whole URL. Back in Processing, edit the variable ifttt_url in line 11 and add the URL you just copied in between the quotations marks.
Now, make sure that you have allowed push notification in your app. Run the Processing sketch and touch electrode 11. In Processing, you should see the message “Message sent” again and on your phone you should get a notification!
Step 7 Use with sensors
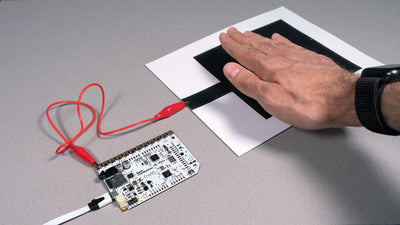
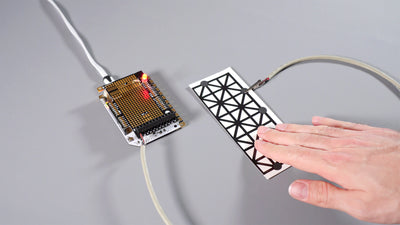
Now that you have it up and running, you can add Printed Sensors to your Touch Board and embed the Printed Sensors in your surroundings, for example, underneath the door matt.
You might need to tweak the thresholds of the electrodes, which you can do with the Grapher!
Step 8 Next steps
With IFTTT, you have a whole range of options! Instead of just getting a notification on your phone, you can also tweet something, post on Facebook or even write something in Evernote! There is also a whole range of existing IFTTT Applets, you can choose an IFTTT Applet and tweak for your use, for example, to create smart lights with Philips Hue light.