How to incorporate Electric Paint into graphics

Use Electric Paint as an aesthetic and functional element of your project.
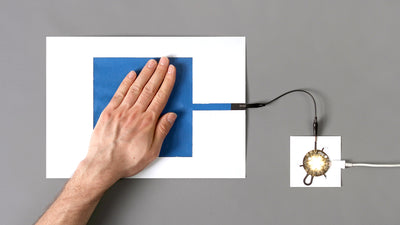
In this tutorial, we are going to demonstrate how to incorporate Electric Paint into graphics. This is a very neat technique to subtly include Electric Paint in your designs and turn them into sensors. Using this method, you can achieve precise traces without the need for screen printing. This is also the method that we use in our Electric Paint Lamp Kit.
We love it when you share your projects! Post your project on Instagram, YouTube, or Twitter, and make sure to tag @bareconductive or use #bareconductive. You can also send your videos and photos to info@bareconductive.com so we can post them on our site for the world to see.
You will need:
- Electric Paint 10ml, 50ml or 1l
- Light Up Board, Touch Board, or Pi Cap
- Sundry paint supplies
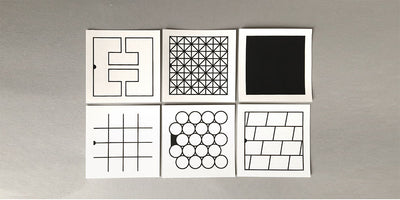
Step 1 Lay out your graphic
We will use our Light Up Board for this tutorial, but the same principle would apply if using a Touch Board or a Pi Cap.
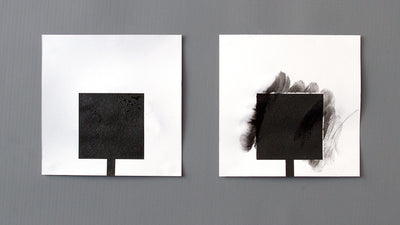
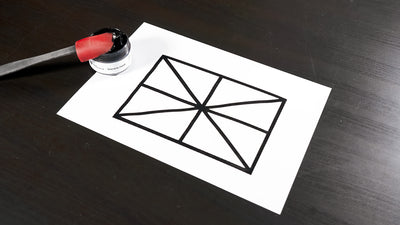
First, draw two parallel black lines around your interface. In this example, we have used a star as our interface. Make sure to extend the lines to the edge of the paper. We will use these lines to connect your graphic to your board. Then, fill the lines in with Electric Paint.


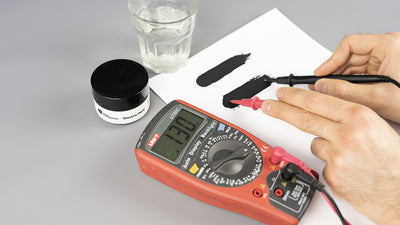
Step 2 Connect your graphic to your board
When the paint has dried, connect your board to the Electic Paint and turn the board on. Now, when you touch the black lines, you will trigger the sensors of the board! You can use this method with our Touch Board, Pi Cap, or Light Up Board.