How to screen print with Electric Paint

Create crisp, repeatable graphics and sensors with this simple printing technique
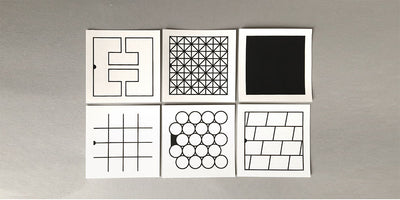
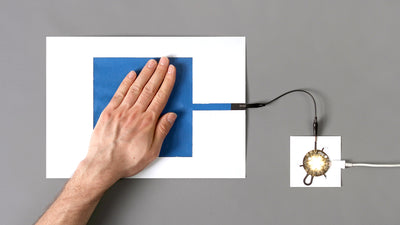
Screen printing or silk screening is an excellent printing method to get multiple clean graphics with Electric Paint. For example, we use screen printing to create our Printed Sensors. All you need is your screen printing supplies: vinyl, a screen with a mesh, Electric Paint, and a squeegee. The best type of screen is with a mesh count of 43T – 90T. You can screen print on any flat surface such as wood, paper, a shirt, or a garment.
We love it when you share your projects! Post your project on Instagram, YouTube, or Twitter, and make sure to tag @bareconductive or use #bareconductive. You can also send your videos and photos to info@bareconductive.com so we can post them on our site for the world to see.
You will need:
- Electric Paint 50ml or 1l
- Screen printing screen with a mesh count of 43T-90T
- Screen printing squeegee
- Screen block (or vinyl as we will use here)
Step 1 Prepare the stencil and the screen
Screen printing works by selectively blocking portions of the screen so that ink cannot pass through. You block the negative space of your design. You can block the screen in a few ways. Screenblock, a UV-sensitive photo emulsion, is the most robust and professional method, but it requires special equipment and practice. In this tutorial, we're going to take a shortcut and use a vinyl stencil to block the screen. It's not as robust or precise as screen block, but it's much faster. As you'll see you could also use masking tape to block the screen if your design is simple.
The first step is to prepare the stencil with which you are going to create the prints. You can design your stencil with an illustration program, such as Illustrator, and then use a vinyl cutter, such as Silhouette, to create the stencil.
With your stencil ready, apply masking tape over the cutouts. Then remove the backing from one corner and stick the stencil down onto the screen. Slowly take away the backing, ensuring that you stick the stencil down and that the cutouts are being removed simultaneously. Try to avoid any air bubbles being caught, otherwise, push them outwards.
Remove the masking tape and cutouts, and then cover the sides of the stencil and screen with masking tape. This will make cleaning the screen much easier and avoid getting paint all over the surface where you don't want it.
Step 2 Apply Electric Paint
Secure the surface in case there's a chance of it coming loose, for example with card or textile.
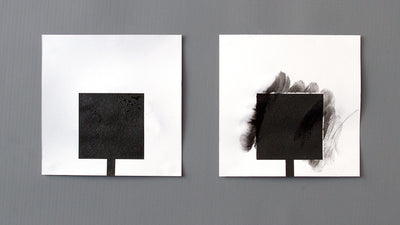
Lay the screen with the stencil over the surface. With a spatula, spread some paint across the edge of the stencil. Take the squeegee, put it down at a 45-degree angle, and spread the paint across the stencil. Do this once or twice, and maybe from the side too. When you're done, carefully lift the screen off the surface.
Step 3 Next steps
If you're doing multiple editions, print all your runs as quickly as possible as the paint can dry on the screen and block the paint from going through. If this happens, you can simply wash off the screen with water, as our Electric Paint is water-based, and start again.
If you want the paint in a different color, you can cover it with different paint.