How to make a proximity sensor with your Pi Cap

Build proximity and touch sensor functionality into your Pi Cap project
You can use the twelve sensors on your Pi Cap to both trigger touch events and to sense proximity! All you need is the Pi Cap, a bit of Electric Paint, and a bit of coding. In the end, you could create some awesome musical instruments that you can trigger from a distance!
In this tutorial, we show you how to modify the code to turn your touch sensors to detect proximity.
We love it when you share your projects! Post your project on Instagram, YouTube, or Twitter, and make sure to tag @bareconductive or use #bareconductive. You can also send your videos and photos to info@bareconductive.com so we can post them on our site for the world to see.
You will need:
- 1 x Pi Cap
- Electric Paint 10ml, 50ml or 1l
- 1x Raspberry Pi 1 A+ or B+, Raspberry Pi 2 or Raspberry Pi 3 setup with the Pi Cap (see Step 1) or 1x Raspberry Pi Zero setup with the Pi Cap (see Step 1)
- 1 x speaker
- Sundry painting supplies
Step 1 Setup a Raspberry Pi & Pi Cap
If you haven’t set up your Pi Cap then make sure to complete our setting up tutorials first:
Setting up your Pi Cap on the Raspberry Pi 1, 2 or 3
Setting up your Pi Cap on the Raspberry Pi Zero
In this tutorial, we are using the network connection to work with the Pi Cap. If you are using a screen with your Raspberry Pi, that’s fine. All the steps here apply to the screen method. Click here for more information about the Raspberry Pi.
Step 2 Edit the code
To create a proximity sensor, we are going to modify one of the example codes that you installed when you set up the Pi Cap in the previous step.
Make sure that your Raspberry Pi is turned on. After you have logged in to your Pi Cap via SSH, head to folder “picap-touch-mp3-cpp” by entering “cd ~/PiCapExamples/cpp/picap-touch-mp3-cpp” into the Terminal window.
Then enter “nano touch-mp3.cpp”; this will open the code in a text editor.
If you scroll down, you can find two variables: touchThreshold and releaseThreshold. These two variables determine how sensitive the electrodes are. By decreasing their values, the electrodes become more sensitive, their default values are 40 and 20, respectively.
For now, set touchThreshold to 4 and releaseThreshold to 2. Exit the editor by entering CTRL + X and then Y for Yes.
Now we’re ready to create our sensor!

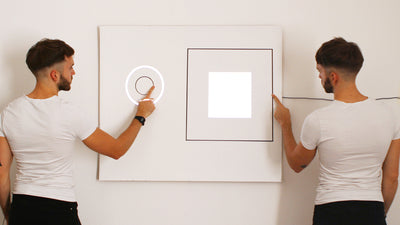
Step 3 Make a sensor
With your sheet of paper, you are going to create the proximity sensor, using masking tape, tape out a big square. Make sure to fluff your tape up on your jeans so that it doesn’t tear the paper. We also recommend using some heavy paper stock.
Tape out a 1cm thick line from your shape to the edge of the paper to easily connect to the Pi Cap.
When you have your shape ready, paint it with Electric Paint. Remove the masking tape immediately when you’re done the painting. Leaving the paint to dry first and then removing the tape might result in cracking the paint.
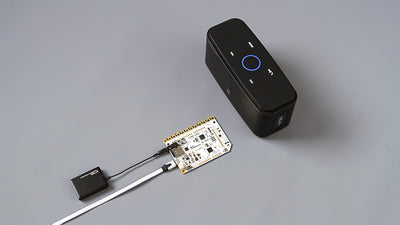
Step 4 Connect sensor to Pi Cap
Once your sensor has dried, connect it to the Pi Cap. Using a crocodile clip, attach one end to the sensor and the other end to electrode 11 of the Pi Cap. Make sure that the connection between the board and the pad is short and doesn’t touch other cables as this can cause false triggering.
Connect some speakers to the Pi Cap if you are using a Pi Zero, or to the Raspberry Pi itself if you are using the Raspberry Pi A+ or B+.
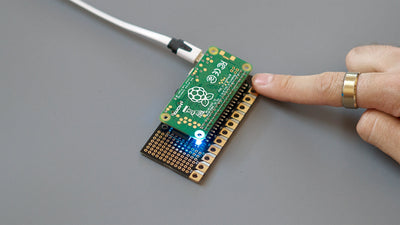
With the Raspberry Pi still on, head back to your computer and in a Terminal window, type “./run” and hit enter. Make sure you are still within the folder picap-touch-mp3-cpp folder. The code is now running. You won’t see any outputs unless you touch an electrode, which is as expected. If you want to cancel the code press CTRL + C.

Step 5 Triggering the track and further info
If you now wave your hand slowly over the pad about 5cm from the pad, you should hear a cowbell!
Congratulations! You reached the end of the tutorial. You can, of course, edit the other C++ Pi Cap examples and use proximity sensing instead of touch sensing. Simply repeat Step 2 for the respective code example. You can also edit the other languages, Python and Node, in a similar manner, just have a look for the touch and release threshold values.
Note that the touch threshold values always need to be bigger than the threshold value. If you ever want to visualise how sensitive your electrodes you can have a look at this tutorial Grapher here. Have fun exploring!
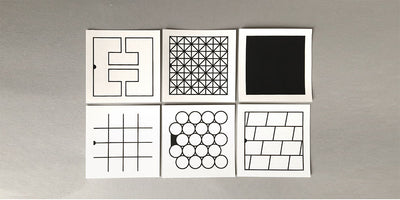
Step 6 Using Printed Sensors
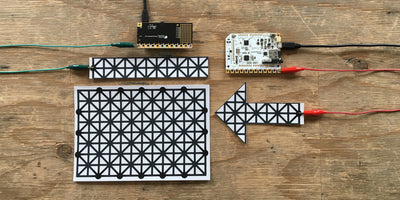
Instead of making your own sensor, you can also use our Printed Sensors to trigger the track with proximity. You can customise the Printed Sensors, their pattern is ideal for proximity sensing and they are sealed to prevent smudging. Simply connect one Printed Sensor with a crocodile clip to the Touch Board.