How To Use The Touch Board As A MIDI Controller

Connect your Touch Board to music creation software on your computer or tablet
The Touch Board can be used as a MIDI controller to send MIDI note data to Apple GarageBand or other music creation software that accepts external MIDI controllers. If one of the Touch Board's electrodes is triggered, the board sends the data to GarageBand. Using the Touch Board is a great way to create a minimal interface to play your music.
You can either use GarageBand on your Mac or your iPad or iPhone with the Touch Board, but for the iPhone or iPad, you will need the Lightning to Camera Adapter to connect the Touch Board with iOS devices.
We love it when you share your projects! Post your project on Instagram, YouTube, or Twitter, and make sure to tag @bareconductive or use #bareconductive. You can also send your videos and photos to info@bareconductive.com so we can post them on our site for the world to see.
You will need:
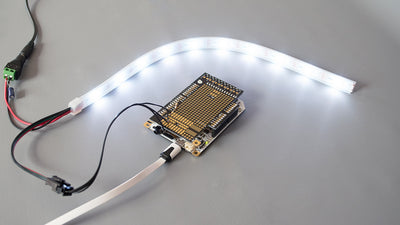
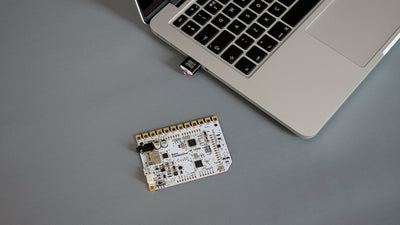
- 1 x Touch Board
- 1 x USB Micro B to USB A or USB C (depending on your computer's USB port type)
- 1 x Computer running Mac OS, Windows or Linux with Apple GarageBand or similar installed
- 1 x Apple Lightning to Camera Adapter (optional)
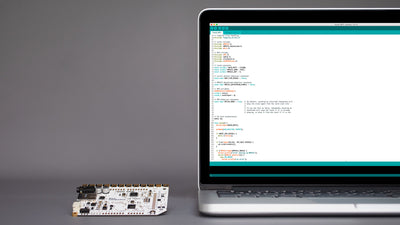
Step 1 Upload the MIDI interface code to the Touch Board
If you haven't already learned how to re-program your Touch Board, make sure to follow that tutorial now and then return here. Open the "Midi_interface" code in Arduino and change the code in line 69 from "true" to "false" then upload the code to the Touch Board, making sure that you have selected "Bare Conductive Touch Board (USB MIDI, iPad compatible)" under Tools -> Board.
If you have set up the MIDI piano with the Touch Board before, then there is no need to remove the MIDI solder bridges of the Touch Board, you can keep them on.
Step 2 Connect the Touch Board to GarageBand
For this tutorial, we use GarageBand as an example, but the principle should apply for other music creation software that accepts input from external MIDI controllers.
If you are using GarageBand on a Mac, open the application, making sure your sound is on. Select "Empty Project" and "Software Instrument". This opens "Classic Electric Piano." If you touch the Touch Board's keys, it will play the piano notes in GarageBand.
If you are using GarageBand on an iPhone or iPad, you first need to install GarageBand from the iOS App Store. Additionally, you will need a Lightning to USB Camera Adapter. Once you have downloaded the app, turn the Touch Board off and disconnect it from your computer. Then, connect the Touch Board to the USB Camera Adapter via the USB port and the Camera Adapter to the device. Open GarageBand on your device and create a new project by selecting "Smart Piano" in "Keyboard". Make sure that you can hear the audio of your device. Turn the Touch Board back on. In GarageBand, it should detect the MIDI input from the Touch Board. Test the connection by running your finger across the Touch Board's electrodes. You should hear the piano notes from your device
Step 3 Changing the notes
The Touch Board's default code is set to play a scale from C3 to B3 in semitones. If you want to change the notes to play your music, you need to edit the MIDI code.
Step 4 Changing the instrument
GarageBand's default instrument is the "Grand Piano" or "Classic Electric Piano", but you can just change the musical instrument to something else you would like to play with your controller keyboard. Note that a percussion instrument uses a different MIDI note number system than MIDI melodic instruments, as they use percussion sound instead of notes. You can find an overview of which number corresponds to which percussion sound on the second page here.
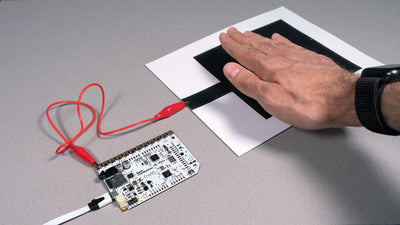
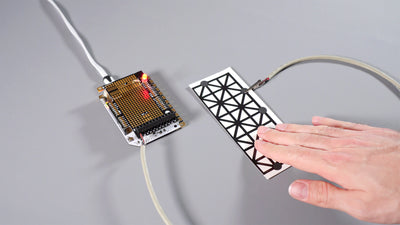
Step 5 Create a paper controller
Now that you know how to connect the Touch Board to GarageBand, you can create a keyboard controller for your audio for the Touch Board. Either you can use one of the Printed Instrument Sensors as a MIDI controller, paint your piano keyboard with Electric Paint or connect other conductive materials to the electrodes to make a keyboard for GarageBand. Using the Touch Board as your interface allows you to create a simple interface with a couple of buttons to play the audio. The benefit of designing your keyboard with Electric Paint is that you can create an audio interface that makes it easier to play your music by using the necessary notes. So if you want to play only three notes, you can just paint 3 buttons.
Step 6 Further steps
You can also use the Touch Board as a MIDI controller to send MIDI data to Ableton Live on a Mac. You can find more about in our Ableton Live tutorial.