How To Write Code For The Touch Board

The Touch Board can be easily reprogrammed with the Arduino IDE and in this tutorial, we'll walk you through how the code works and how to write your own code!
We provide a range of sample codes for the Touch Board that you can simply upload to the board. But if you want to write your own code there are some things to consider. In this tutorial we're going to break down the code and explain how the code works. This is not a comprehensive introduction into coding, for this we would recommend checking out Arduino's learning resources.
If you have never programmed before, continue reading below as we'll give you a crash course in programming that you can follow along on your Touch Board. If you have programmed before, you can skip to the next part.
Learn how coding works
The fundamentals of programming are variables. A variable can be seen as a container that can have different values, for example
a = 2
b = 3
where a and b are variables that contain a number. You can use these variables to do computations, for example
x = a + b
and the result would be that the variable x = 5.
In order to register events in code, programmers like to use if statements. The idea is simple: "if a condition is true, then the following happens; else, something else happens". And this is also where variables play an important role. So for example
if (x == 5) {
 "x is equal to 5"
} else {
 "x is not equal to 5"
}
Here we are checking if x is equal to 5 and if it is true, then we write out "x is equal to 5". We know that x is equal to 5, because x = a + b = 2 + 3 = 5. If we change the value of either a or b, for example a = 3, then x wouldn't be equal to 5 anymore and our if statement would output "x is not equal to 5".
There are different types of variables; some common data types are integers, which are full numbers, e.g. 0, 1, 10, 14, and so on (a, b and x are integers in our example). Another data type we use in our code a lot are booleans, which can take the value "true" or "false", for example
boolean_variable_1 = true
boolean_variable_2 = false
These are very useful for if statements again, for example
if (boolean_variable_1) {
 "Proceed to the next step of code"
 x = a + b
} else {
 "boolean_variable_1 is false"
}
You can read this if statement as "if boolean_variable_1 is true, write out "Proceed to the next step of code" and compute a + b and store it in x. If boolean_variable_1 is false write out "boolean_variable_1 is false"".
Another useful tools are for statements. With these you can quickly change the value of a variable and do computations. For example
for (i = 0, i+1, i < 4) {
 x = x + i
}
What happens here is that i changes the value from 0 to 3 by 1 each time and every time it does, the current value of gets added to x. So x would change the 4 times:
x = x + i = 5 + 0 = 5
x = x + i = 5 + 1 = 6
x = x + i = 6 + 2 = 8
x = x + i = 8 + 3 = 11
One more fundamental of coding we want to highlight are functions. They can be seen as block of codes that can be accessed whenever the code is sent to a function. This will make sense when we run through the code of the Touch Board.
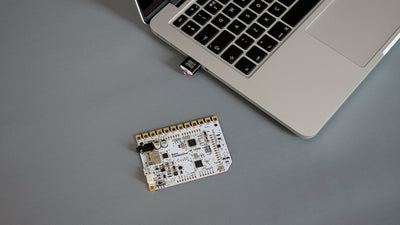
Understand the structure of the Touch Board
The Touch Board is a microcontroller, which can be viewed as a small computer. Like a computer, the board has a processor that is in charge of executing the code that is uploaded on the board. Out of the box, the Touch Board has the code "Touch_MP3" uploaded to it. The processor on the Touch Board is the ATmega32U4. In addition to the processor the Touch Board also has a chip called MPR121, which is in charge of reading the capacitive electrodes. In order for the processor ATmega32U4 to communicate with the MPR121, the processor uses a communication method called I2C. This is quite a common method, and if you want to add another tool to the Touch Board have a lookout if they use I2C to communicate too.

Understand the code of the Touch Board
Open the Arduino IDE and open the code "SimpleTouch". Right at the beginning you can see a chunk of code written in grey starts with /* and ends with */. This part of the code isn't read by the Touch Board and is called a comment". You can either write a comment block by embedding it with /* and */, as we have here, or you can have a comment per line by adding //, which you can see further down. A comment is intended for the programmer only and helps them understand the code. In the opening block, we have included a short brief about the code's purpose and the copyright laws (all our code is open source, meaning you can do whatever you want with it).

Below the block of comment, you want several lines starting with #include, for example #include <MPR121.h>. This is used in order to include libraries of code that is used by the Touch Board. You can view a library as a pre-written code that doesn't need to be changed, but is instead used as a building block for the code. So by including the MPR121.h library, we are including the Touch Board's capacitive electrodes. The MPR121_Datastream.h library is an additional library for the MPR121 in order to send data to the computer. The Wire.h library is to include the I2C communication we mentioned above. So if you want to include capacitive sensing on the Touch Board you need these three lines.

Next come three lines that start with const. These are constants in the codes. They are similar to a variable, as in they are a container to hold a value, but they don't change the content later in the code. Variables on the other hand do change when compiling the code, for example, there's the variable later for "which electrodes is touched". The constants we have here for BAUD_RATE, MPR121_ADDR, MPR121_INT will never change once the code is uploaded, so that's why they are written as constants.
There is another constant, the constant for MPR121_DATASTREAM_ENABLE. Remember how we talked about sending data of the MPR121 to the computer when we included libraries? Most of the time, we don't need to send data to the computer, which is why the constant is set to false. We'll come back to this constant later.
So far this has only been the introduction. Now comes the real part. When the Touch Board is powered on, the first part that is run is the function void setup() and everything that is written between it's curly brackets. After the setup function comes the function void loop(). This function runs constantly unless interrupted or the Touch Board is turned off. A function is not too different from a library, it's a chunk of code that can be accessed to whenever it is called upon. But unlike a library, which is only called once at the beginning of the code, a function can be called multiple times.

It's easier to understand what's happening if we go through the loop first. The loop function here is constantly reading the MPR121 chip and reading the values. This is happening in the line of MPR121.updateAll();. Following, we have our first if statement within a for statement, but let's focus on the if statement first. The if statement checks for MPR121.isNewTouch(i), which is a boolean variable from the MPR121 where i is the value for an electrode. So if electrode 0 is touched then i = 0 and MPR121.isNewTouch(0) is set to true. The statement can be read as "if there is a new touch on electrode i, then the code within the curly bracket happens" and i is the variable that can have the value from 0 to 12 from the for statement. If an electrode was touched, all that happens is that the Serial Monitor in Arduino is writing "electrode i was touched", with i being the variable.
The if statement is followed by an else if statement, meaning if the first condition wasn't met, the code skips to this part. Here the code checks for the boolean variable of MPR121.isNewRelease(i). It can be read as "if electrode i isn't touched anymore, then the code within the curly bracket happens". In this scenario "electrode i was released" is written to the Serial Monitor.

Now let's run through the setup function. First, we set up the rate for Serial communication. Serial communication is similar to I2C communication we mentioned before. Whereas I2C communication was the communication between the microprocessor and the MPR121 chip, Serial communication is the communication between the computer and the microcontroller. The value BAUD_RATE was defined before as a constant. Next, comes another if statement, which is checking for the boolean MPR121.begin(MPR121_ADDR). The exclamation at the beginning is interpreted as "not". So the statement can be interpreted as "if MPR121 chip was not found at the address MPR121_ADDR, then the code within the curly bracket happens". The whole if statements is to catch any errors if the MPR121 isn't accessible.
MPR121.setInterruptPin(MPR121_INT); is essential for the MPR121 to work. It's using setting up the interrupt pin for the MPR121 and is essential for the MPR121 chip to work, so we need to have it here.
Next comes another if statement: if (MPR121_DATASTREAM_ENABLE). Remember how we set up MPR121_DATASTREAM_ENABLE at the beginning of the code and set it up as false. In this case the if statement reads as "if MPR121_DATASTREAM_ENABLE is set as true, then the code within the curly bracket happens, else, if it is set as false, then the code within the else curly bracket happens". Since it is set as false, the else statement is the one that is run. Here, the threshold values for the MPR121 sensors are set. This is used to set up proximity or touch sensing, which you can read more about here.
Following there are a couple of more bits of settings for the MPR121 chip regarding filtering data. MPR121.setFFI is the value for the first filter, MPR121.setSFI is the value for the second filter. Finally, MPR121.setGlobalCDT is the value for charging. All these come down to the mechanism of how capacitive sensing works.
Then the LED on the Touch Board is lit up with digitalWrite(LED_BUILTIN, HIGH);, the MPR121 chip reads the environment and autosets the electrodes MPR121.autoSetElectrodes and then the LED is turned off again.
This may be a bit complicated, but don't worry, these are just building blocks, you don't need to edit them. When you write your own code, you can copy paste most of the code and add parts that you need.
Write your own code
When you are writing your own code for the Touch Board, we recommend using one of our example codes as a basis. The parts we just covered are the foundation of the Touch Board and should be found unchanged in most example codes, except for a couple exceptions.
To start a new file, go to File -> New. The code of SimpleTouch code is a good start, so simply copy paste the code and then add your edits. When you are adding new bits to the code, we recommend doing so bit by bit. The steps are:
- Write small part of the new feature
- Test it
- Add next part
And this is done in loops. So for example if you want to turn on LEDs when touching an electrode, the first step is to turn on the LEDs. Does it work? If no, try to figure out why. Google is your best friend for finding answers. If it does work, then try adding the touch sensing to the LEDs.
Another good way to writing code is using parts of other codes. Have a browse through our example codes and see what you can find for your next project!