Touch Board Troubleshooting Guide

Everything you need to get your Touch Board project back up and running
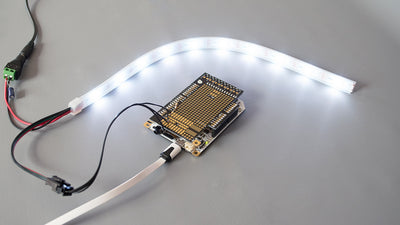
The Touch Board is a versatile device to create interactive projects. The Touch Board is based around an Arduino Leonardo and can be reprogrammed via the Arduino programming environment (IDE). You can use our example code or write you own.
Out of the box, the Touch Board is programmed to play MP3 files when the sensors are touched. Problems with the Touch Board typically fall into two categories, code issues, and mechanical issues. This tutorial will take you through troubleshooting the most common problems.
If you get stuck or still can't find a solution, reach out to us at info@bareconductive.com. We're here to help!
We love it when you share your projects! Post your project on Instagram, YouTube, or Twitter, and make sure to tag @bareconductive or use #bareconductive. You can also send your videos and photos to info@bareconductive.com so we can post them on our site for the world to see.
You will need:
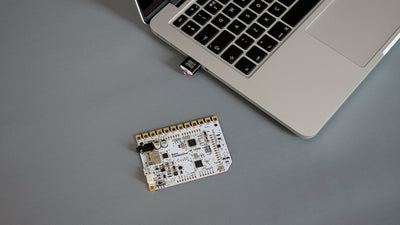
- 1 x Touch Board
- 1 x USB Micro B to USB A or USB C (depending on your computer's USB port type)
- 1 x Computer running Mac OS, Windows, or Linux
Step-by-step Guide to Troubleshoot the Touch Board
Follow these steps to find out whether it's the Touch Board that is failing, or whether there is an issue with the code or the set-up.
- Turn the Touch Board off and disconnect anything attached to the Touch Board's sensors, e.g. Electric Paint, crocodile clips and other conductive materials. If this would destroy your work, you can skip this step, but bear this in mind.
- Place the Touch Board on a non-conductive surface, e.g. a table or card. Other electronic devices might influence the Touch Board, so also make sure the Touch Board isn't placed on a laptop.
- Connect the Touch Board to your computer or laptop with a Micro USB cable and turn the board on.
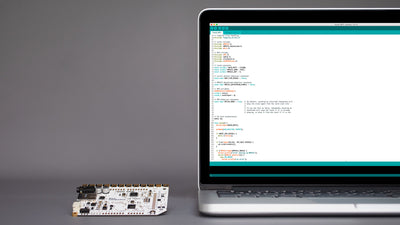
- Using the Arduino IDE, upload the code "SimpleTouch" by selecting it from File → Examples → MPR121 → Examples. If you are unable to upload the sketch or haven't done this before, head to the section "I can't upload code to the Touch Board" below.
- After the code has uploaded, open the Serial Monitor in the Arduino IDE by clicking on the icon in the top right corner or by selecting it from the menu Tools → Serial Monitor.
- Touch the electrode 0, you should see in the Serial Monitor the statement written "electrode 0 was touched". If you don't see this, head to the section "The electrodes of the board aren't working" below.
- If the electrodes are working as expected, then we know that the Touch Board's sensors are fully functional. The next question is, what outcome are you expecting? Are you expecting the MP3 files being played but you can't hear anything? Then head to the section "I can't hear the MP3 files when touching the electrodes" below.
- For any further help contact us at info@bareconductive.com and if you can send us pictures of your set-up and output you are expecting.
"I can't upload code to the Touch Board"
In order to change the code on the Touch Board, you need to install the Touch Board installer for the Arduino IDE.
If you are unable to run the installer, try the manual installer instead, which you can download here. Simply follow the instructions that are included in the installer.
If you are unable to locate the Touch Board within the Arduino IDE under Tools -> Port, but you ran the Touch Board installer, then check your cable. Some USB cables are for powering only, but you need to use one that works both for powering as well as transmitting data. If you bought the Touch Board in one of our kits, please use the USB cable that came with the kit. If you bought the Touch Board separately, please try using a different cable.
If you are able to locate the Touch Board under Tools -> Port, but the code isn't being uploaded, and instead it's just idle, or you get the error message avrdude: butterfly_recv(): programmer is not responding, then please try following these steps:
- Press the reset button on the Touch Board
- Make sure that you don't have any menus open in the Arduino IDE
- While the L LED is flashing, select the correct port from the Tools -> Port menu in the Arduino IDE (you have about 8 seconds to do this)
- Ensure that Bare Conductive Touch Board is selected in the Tools -> Board menu in the IDE
- Allow the L LED to stop flashing
- With the code that you want to upload open in the IDE, click the upload button and immediately after, press and hold the reset button on the board
- Release the reset button at the point where the text above the black console at the bottom of the screen changes to "Uploading…"
"The electrodes of the board aren't working"
The sensors might not respond or trigger an output erroneously for a couple of reasons. First, make sure that you are not touching the sensors when you turn the Touch Board on and that the Touch Board isn't placed on a conductive surface.
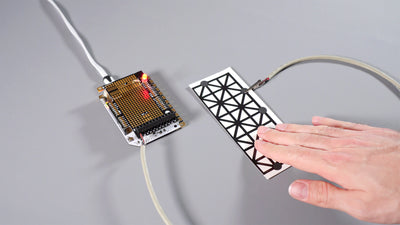
If your sensors aren't responding, then we always recommend using the Grapher first, it helps you visualise the sensors. Work yourself up from testing the electrodes directly on the Touch Board to one large sensor after another.
If you are attaching anything to the capacitive sensors of the Touch Board, make sure to reset the Touch Board, either by turning it off and on again, or by resetting it with the Reset button on the board, or by resetting it via the Grapher. When the board first turns on, it spends a few seconds finding a background capacitance level against which to detect touches, any time you connect something new to the Touch Board you need to let it readjust so that each electrode can do the necessary calibration.
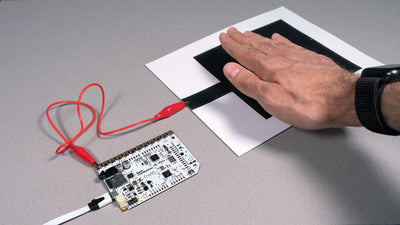
Make sure that any connections to the sensors is stable and constant, so for example with alligator clips, make sure that they are secured to the surface and are not overlapping each other. In your design, there shouldn't be any displacement of the sensors. Overlapping clips can cause interference and noise, so stabilising them helps.
If you are painting long lines with Electric Paint as an interface, you need to be careful. Electric Paint can have a high resistance over a long distance, which means that the signal might get lost at such a long range. You can then either paint shorter lines with Electric Paint or change the threshold values. You can change the threshold values with the Grapher or with the code in order to detect your target, you can even have a variation in the thresholds for each electrode. Also, make sure the Electric Paint hasn't cracked anywhere, if it has, just apply another layer of Electric Paint.
Also, like with wires, make sure that the Electric Paint connected one electrode isn't touching the paint of another.
If you are using long cables to create sensors, make sure to use shielded cable, otherwise, the non-shielded cable will pick up noise.
Sometimes, there can be interference with the sensors due to background noise or because a ground reference is missing. This is especially true for when using the Touch Board with a battery or a power bank. One quick way to eliminate this noise is by grounding the Touch Board and connecting the GND connection of the Touch Board to ground.
"I can't hear the MP3 files when touching the electrodes"
The Touch Board can play MP3 files from its SD card, or act as a MIDI synthesizer. If you have previously set up the Touch Board as MIDI synthesizer, for example as a piano, but now you want to play MP3 files again, then you need to remove the soldering from the two solder bridges of the Touch Board and upload the right code, for playing MP3s, it's "Touch_MP3". Also make sure that the headphones or speakers that you are using are fully charged, and plugged in all the way into the Touch Board.
If you are using your own MP3 files, make sure that you have labelled them correctly, you can find a detailed tutorial here. Sometimes it's good to start from scratch if you are getting stuck, so if you want to use the example files that came with the Touch Board, you can download them here. If you have to reformat the SD card, it needs to be set as MS-DOS (FAT) format.
Also, make sure that the micro SD card is fully inserted into the Touch Board and remove any dirt if applicable.
Another issue might be if you have attached another device to the Touch Board by connecting it to some of the digital pins. Some of the pins are already in use for either the on-board MIDI and MP3 player. Click here to see which pins are available.
Reset to factory settings
If you want to reset the Touch Board to factory settings, you need to upload the "Touch_MP3" code, which we explain here how to do so. You also need to reset the files on the Touch Board to default ones, which you can download here. If you need to freshen up your memory on how to change the files, you can find a detailed tutorial here. Also remove anything soldered to the Touch Board, including the MIDI bridge.