How To Change The Code On The Touch Board With The Arduino IDE

Upload new sketches to transform the functions of your Touch Board
The Touch Board is based on the Arduino Leonardo and works with Arduino's integrated development environment (IDE) software. The board comes pre-installed with the "Touch_MP3" code, but if you want to change or modify its code, you need to use the Arduino IDE. This tutorial takes you through the Arduino IDE setup step by step and shows you how to upload an Arduino sketch to the Touch Board.
If you are doing this tutorial for the first time, you probably need to set up the Arduino IDE first, so just continue below. If you have set it up before, you can skip to the next part.
We love it when you share your projects! Post your project on Instagram, YouTube, or Twitter, and make sure to tag @bareconductive or use #bareconductive. You can also send your videos and photos to info@bareconductive.com so we can post them on our site for the world to see.
You will need:
1 x Touch Board
—
1 x USB Micro cable
1 x Computer
Set up the Arduino IDE and add the files
First, download the Legacy Arduino IDE (1.8.X) Arduino IDE from the Arduino website. The Touch Board does not work with Arduino IDE 2.X.X. Once you've downloaded the Arduino IDE, please save it to your Applications folder on macOS or run the installer on Windows. The Touch Board doesn't work with the Arduino web editor.
Please note that for Windows, the Arduino IDE needs to be installed from the Arduino Website and not from the Windows App Store.
Open the Arduino IDE once and close it again, creating the necessary Arduino folders in your Documents folder.
Download the manual installer. Simply follow the instructions that are included in the installer by copying the right folders into the right locations.
Change the code
Now that you have the Arduino IDE set up, you can change the code on the Touch Board! In this example, we're going to show you how to upload "Touch_MP3", the code that comes pre-installed with the Touch Board, but you can upload any code.
Open the Arduino IDE and select the Arduino project Touch_MP3 from
File→Sketchbook→Touch Board Examples→Touch_MP3
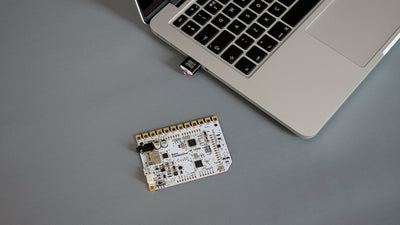
Then, connect your Touch Board to your computer and turn on your board. On Windows, you may see a message pop up telling you that a driver is being installed. Your computer may alert you that the installation has failed, but it will work correctly once the installer is complete. Please wait up to two minutes before proceeding.
In the Arduino IDE, select the Touch Board from
Tools→Board
Additionally, select the board from
Tools→Port
Search for the ports labeled Bare Conductive Touch Board. There may be several options available on Linux and Mac machines. Choose the one with "CU" in the name. In Windows, there should be one COM port labeled Bare Conductive Touch Board – choose this.
With the board selected twice, click on the upload button. Please give it up to a minute to upload. When the upload is complete, the Arduino IDE will report "Done uploading." You can also tell by checking the Touch Board. Once the LED stops flashing, the Touch Board has uploaded the code.
On Windows machines, you may now see another attempt to install a driver, which most likely will appear to fail, and the upload will fail too. Again, please wait up to two minutes and try again. This failure will only happen the first time you reprogram the Touch Board.
We also want to thank BitRock for their support, who make the excellent InstallBuilder, which we used to create our installer for you. Even better, they generously gave us a free license for it because we distribute open source software!