Make An Interactive Framed Print With The Touch Board

Turn touch into sound with this simple interactive project using the Touch Board and Printed Sensors
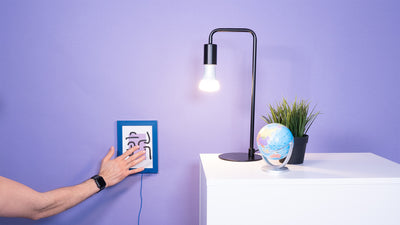
In this tutorial, we are going to show you how to make an interactive print within a picture frame. Choose your favorite picture and song, or create a custom soundwave print as we did here so you can see and hear your favorite song at the same time! When you touch the print through the frame's glass, it will play the song loaded on your Touch Board. We use Printed Sensors behind the print act as a proximity sensor and are connected to a Touch Board and speaker behind the frame.
We love it when you share your projects! Post your project on Instagram, YouTube, or Twitter, and make sure to tag @bareconductive or use #bareconductive. You can also send your videos and photos to info@bareconductive.com so we can post them on our site for the world to see.
You will need:
- 1 x Touch Board
- 1 x Printed Sensor
- 1 x Electric Paint 10ml
- 1 x USB Micro B to USB A or USB C (depending on your computer's USB port type)
- 1 x Computer running Mac OS, Windows or Linux
Demo
Take a quick look at our demo video to see what you'll create.
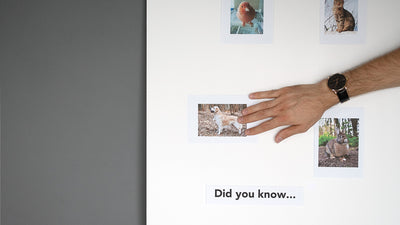
Choose your image
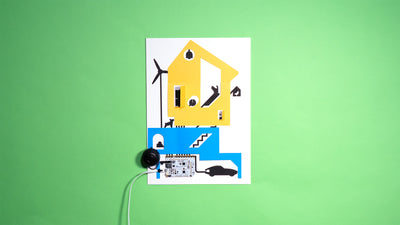
First, you need to select your image. Family, friends, dog! Whatever you want to use will work. We're going to create a sound wave print. We used this website to generate a sound wave from a song. You should print your image on thick paper if possible, or make sure to insert another piece of paper behind it when you assemble your frame, because otherwise the Printed Sensor will show through later.

Upload the code and the song
In this project, we used our "Proximity_MP3" sketch. In order to detect touch through glass and paper, the sensors of the Touch Board need to be more sensitive. Therefore, the Proximity_MP3 code is more suitable than the Touch_MP3 code. If you haven't changed the code on the Touch Board before, or need a refresher, check out this tutorial here.
Simply open the "Proximity_MP3" sketch, which is located under File→Sketchbook→Touch Board Examples→Proximity_MP3, choose the right settings and hit upload!
You also need to upload your song to the Touch Board. Read this tutorial if you haven't changed the sounds on the Touch Board before. We will use electrode E0 to trigger the song, so upload your chosen song named TRACK000.mp3 to the SD card.
Prepare the Printed Sensors
In order to trigger the Touch Board through the glass, we're going to use a Printed Sensor by attaching a strip of the Printed Sensors to the back of the picture frame and then bend it to the back, where we'll connect it to the Touch Board. This saves using bulky cables.
Carefully cut away part of the Printed Sensor, so you are left with a reversed L-shaped sensor. Ensure that the long part of the sensor has a circular dot of the pattern, as this is where you will connect the board. If you look closely you'll see that our Printed Sensors are coated with a lacquer except for the circular nodes on the edge, this is where we will connect the Touch Board.


Assemble sound wave print frame and sensor
Now it's time to assemble! Firstly, place the sound wave print inside the picture frame. Now, add the Printed Sensor behind it, the pattern facing the same way as the print, and make sure the strip extends beyond the frame. Secure the frame backing in place, and bend the Printed Sensor down. Stick it down with Blue Tack, or double-sided tape.


Attach the Touch Board and cold solder
This project only uses one electrode – we used E0. Before you can attach the Touch Board to the frame, you need to make sure that the other electrodes won't interfere. Do this by simply adding masking tape behind the other, unused electrodes.
Attach some Blue Tack or double-sided tape to the back of the Touch Board and place it so that electrode E0 lies over the access node of the Printed Sensor. Cold solder the electrode E0 to the Printed Sensor with Electric Paint by squeezing a drop of Electric Paint into E0. If you want some more details about this process, have a look at this tutorial here.
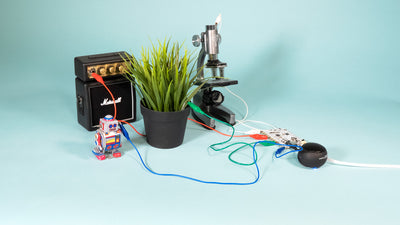
Finally, securely attach the speakers and connect the board to a power source.


Touch the sound wave print
Now, when you touch the sound wave in your print, it will play your song! Well done, you have your very own interactive sound wave print.
If you are having difficulties playing the track when touching the picture, try playing around with the thresholds of the sensors, as described in this tutorial here.