How to measure Electric Paint with a multimeter

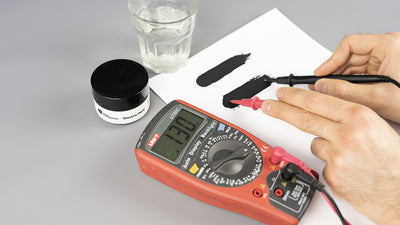
Measure the electrical resistance of different Electric Paint designs with a hand-held multimeter
Electric Paint, is, as it sounds, an electrically conductive paint. Depending on the size and proportions of the pad of paint you create, you will get different levels of electrical resistance. You can measure these changes with a hand-held multimeter. This tutorial explains in detail how to measure the resistance of Electric Paint with a multimeter and what to look out for.
We love it when you share your projects! Post your project on Instagram, YouTube, or Twitter, and make sure to tag @bareconductive or use #bareconductive. You can also send your videos and photos to info@bareconductive.com so we can post them on our site for the world to see.
You will need:
- Electric Paint 10ml, 50ml or 1l
- Sundry painting supplies
- Hand-held multimeter and probes
The settings on the multimeter
A multimeter has many functions, but with respect to the Electric Paint, only two are of relevance: the function to measure resistance (Ohms), indicated with a "Ω" on our multimeter, and to check continuity, indicated with a musical note symbol. Multimeters can also measure current and voltage, but we won't discuss these functions in this tutorial.
When you measure the continuity of an electrical path, the meter checks for a very low resistance. It usually looks for a resistance of less than 100Ω. If the path is continuous, i.e. if the path has a resistance of less than 100Ω and is unbroken, the meter will beep. Since Electric Paint is relatively resistive, the meter will not beep when you check if the paint is continuous. As a result, it is not helpful to evaluate the paint with the continuity setting of the multimeter. Instead, we need to measure its resistance.

Electric Paint's sheet resistance
In an ideal scenario, with uniformly applied paint, Electric Paint has a sheet resistance of 55Ω/square. This measurement was determined with a four-terminal sensing tool, not with a multimeter. You can read more about sheet resistance here. For most applications however, we can use the resistance we measure with a multimeter. Keep in mind that the measured resistance will vary from the paint's sheet resistance, it will also depend on what shape you apply the paint. You can find more details about Electric Paint's resistance in our Application Notes, which you can find here.

Different values of resistance
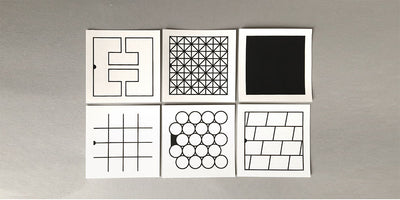
We can use the resistance that we measure with a multimeter to compare the values for different shapes. As mentioned above, resistance changes depending on which shape you apply the paint. On the image on the right, you can see different values of resistance for different shapes and thickness of Electric Paint.
The dot and the first three lines were painted with a tube of Electric Paint. The other lines and the squares were stenciled using a jar of Electric Paint. The resistance was measured from one end of a line to another, or from the corner of one side of a square or rectangle to the corner of the opposite side.
If you look at the third and fourth lines, the ones marked with 1276Ω and 1028Ω, you can see that they are identical in length. But the line with a resistance of 1276Ω was painted with the tube and is thicker than the line with 1028Ω, which was stenciled with the jar. The line made with the tube has a higher resistance, and we can see from these examples that shape and thickness affect the resistance.
If you look at the two squares on the right, you can see that even though they are squares, their resistance isn't 55Ω. This is because they were measured with a multimeter and not with a four-terminal sensing tool. Additionally, the squares were stenciled with a brush, and therefore the layers are not uniformly applied. The resistance that is measured with a multimeter is nevertheless indicative how the resistance decreases when Electric Paint is applied as a square rather than a line.

How to measure the resistance
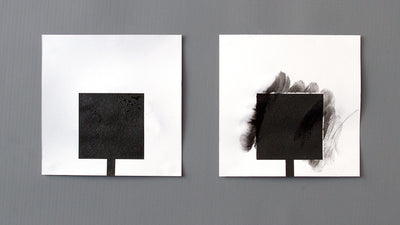
If you draw a line with the Electric Paint, the value of the resistance depends between which two points you measure. The images on the right show two different values of resistance for the same line of Electric Paint but measured between two different points.


Resistance of sensors
The touch sensors of the Touch Board, Pi Cap or Light Up Board work best with materials that have lower resistance. Therefore, short lines of Electric Paint work well with the sensors, but longer lines can have too much resistance. Keep this in mind when you are designing sensors with Electric Paint, you can find a guide to sensor design here.

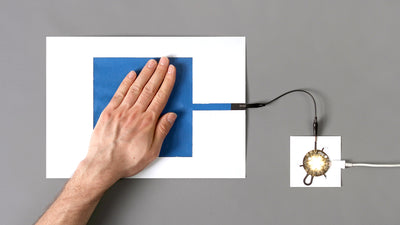
Comparison with other materials
You can connect any conductive material to the touch sensors of our boards. Instead of using Electric Paint, you could use copper tape, which is a great conductor. Compared to Electric Paint, it has a much lower sheet resistance, so you can have longer lines of copper tape than you could do with Electric Paint. In this example, we use copper tape, which is nearly twice as long as the lines in the examples above, yet its resistance is only a fraction. We have summarised some great materials that you can use as sensors here.