Build An Interactive Sound Wall

Learn how to build an interactive sound wall or interactive sound mural with the Interactive Wall Kit using Electric Paint
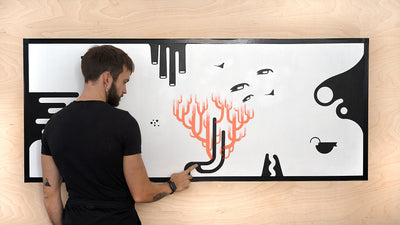
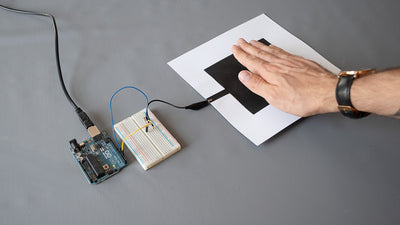
An interactive wall never fails to impress and over the last couple of years, we have seen many interactive displays made by our community to engage visitors at special events. Building an interactive display is straightforward with the Interactive Wall Kit. With this kit, you can paint sensors on a wall using Electric Paint, and when a user touches the paint, triggering a sound or audio file. Our interactive technology makes it easy to make a space more engaging and is robust enough to last through long-term installations.
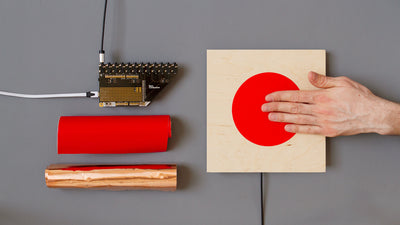
The Interactive Wall Kit uses the Touch Board, our best-selling capacitive board with touch technology, which has 12 electrodes, so you can create 12 touch points on your wall. Together with the Electrode Shield, these sensors can be extended with 5m long shielded cable and Electrode Pads. The pads are attached at the back of a wall and are connected to Electric Paint on the front, adding interactivity to its surface. In most cases creating an interactive wall will require building a fake wall so you can attach and access the sensors from behind. We recommend using plywood of a thickness of around 25mm.
In this tutorial, we give you the full instructions on how to assemble your wall kit the simplest and detailed way. This tutorial is a basic introduction, and assume that you’re creating touch sensors using Electric Paint, and using vinyl stencils for the design. As our focus here is to familiarise you with the assembly process required, we’re also assuming the output will be sound, in this case, MP3s, which requires no programming. We have many other tutorials showing different ways to create graphics, or trigger different outputs to create interactive surfaces such as video walls using projection mapping, so make sure to have a browse if you have something specific in mind or are looking for inspiration. You can download these instructions in an abbreviated PDF.
You will need:
1 x Interactive Wall Kit
Electric Paint
—
1 x PC or Laptop
Vector graphics editor, e.g. Adobe Illustrator
Vinyl and vinyl cutter
Drill
Screwdriver
Build a small-scale prototype
We recommend you read and familiarise yourself with this tutorial before getting started so you understand the steps required to create a full-scale interactive installation. Once you have done so, start by creating a mock-up of your wall and testing your design with one or two sensors. This will allow you to make sure your design works, familiarise yourself with the technology, practice applying Electric Paint, and troubleshoot your sensors.
Prepare your design and apply the stencils
Before you can get started with the technology, you need to have a clear idea of what your audio/visual assets are going to be. It's important to finalize the design first, as the location, size and distance between your touch points will inform where you position your electrodes, and how to run your cables behind the wall. each sensor can be up to 5m away from the Touch Board, the main board who is reading the sensors's signal, you can have a maximum distance of 10m between the two furthest sensors. For this tutorial, we're assuming that you're using stencils with Electric Paint to create conductive graphics on the front of your wall. You can have up to 12 touch points, but you can have more than 12 graphics.
If using stencils, you can design your graphics with a vector graphics editor, for example, Adobe Illustrator. You can then use vinyl and a vinyl cutter to cut out the shapes for your graphics.
Once your stencils are ready, apply them to the front of your wall. On your wall, make sure none of the graphics overlap and that they are sufficiently spaced apart.

Attach Electrode Pads and apply Electric Paint
With your vinyl attached, you can now map where your electrodes need to be placed in order for users to interact with your touch sensors. You'll need to create a connection from the front to the back of the wall. The kit comes with 12 machine screws which should you allow you to create a flush surface on your wall by creating a countersink. Simply use a 3.2mm diameter countersink bit to drill a hole where you want your touch point to be.
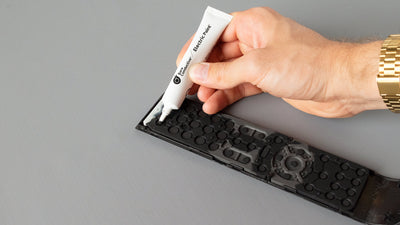
The Electrode Pads can be attached by screwing them onto the machine screws on the back of the wall. We recommend using two self-tapping screws to secure the Electrode Pads in place. Now you have created a connection from the front of our interactive wall to the back. All you should see from the front is the face of your machine screw. Next, you can apply Electric Paint to your wall. Simply paint the stencils with Electric Paint using a paintbrush, and remove the vinyl once you are happy with the results. The paint should cover and conceal the heads of the machine screws, making a connection between your graphic (the touch sensor), and the Electrode Pad in the back.
Connect the Electrode Shield to the Touch Board
On the front of your wall, you should now see all of the sensor graphics that you created with Electric Paint. Behind your wall, you should have all the Electrode Pads positioned, and connected to the front to the sensors. Now you can connect the Touch Board to the wall. Attach the Touch Board somewhere along the bottom of the wall by fixing it with three self-tapping screws. When picking a spot for the Touch Board, there are two key things to keep in mind. 1) Make sure that all your shielded cables can reach from the Touch Board to the furthest Electrode Pad. 2) Position the Touch Board somewhere that will make it easy to connect to power, speakers, and to access, in case you need to do any troubleshooting.
With the Touch Board attached to the wall, you can now connect the Electrode Shield to the Touch Board. Be gentle when doing this as you can damage the pins if they're not properly aligned.
Connect Electrode Pads
You should have now your Touch Board and all Electrode Pads connected to the wall and are ready to connect the board and the pads. But before you start connecting, it's useful at this point to use the cable marker set to mark each pad and shielded cable with the corresponding electrode number of the Touch Board. Your Electrode Pad comes with a white section that you can write on with sharpie. Use this spot to write the number corresponding to the electrode of the board. Next, using the cable markers, mark the cable you are using to connect an electrode to an Electrode Pad. Then, plug one end into the shield and the other into one of the Electrode Pads.
You need to make sure the cables don't shift, which you can do with the cable marking set. Tidying your cables is good practice to avoid interference and to make it easy to troubleshoot if anything goes wrong. First, coil up any cable that is just hanging loose, then add the cable management clips, which you can use to attach the shielded cables to the wall and prevent them from crossing each other too much behind the wall. The nice clean set-up is when the shielded cable runs in a 90º angle from the Touch Board to the Electrode Pad.
Test the wall
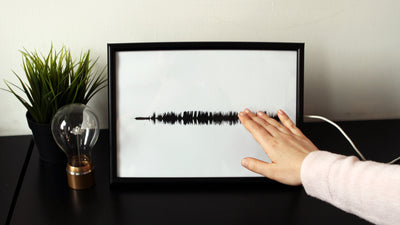
With everything attached and secured, you can now connect some speakers or headphones to the Touch Board and connect the Touch Board to power. Try touching some of the touch points that you painted with Electric Paint in your installation. Unless you've changed the sounds already, you should hear the instructions of the Touch Board!
Next steps
Now that you know how to build an interactive wall, you can take it even further. First, you can change the content of the files being played by the Touch Board, by changing the MP3 files on the Touch Board. If you are using bigger speakers, make sure to avoid ground loop interference by following our speaker guide.
If you want to make an interactive video wall you can either use projection mapping or play videos instead of sounds. For projection mapping using projectors, please follow this projection mapping tutorial. If you want to create an interactive wall display like a video wall, please follow this tutorial on how to play a video with the Touch Board.
If you want to trigger the sensors with proximity, need to fine-tune your sensors and maybe simulate a touch screen via glass with your kit, please follow this tutorial.
Also, instead of creating a touch wall, you can create a touch table or interactive floor, by using the fake wall horizontally instead of vertically.
The Touch Board has a wide range of applications and you can also extend it with Bluetooth or use the board to trigger lights. You can also just have data as an output instead of sounds, and use the data to get information from the interactions, display images or create games.
If you are looking for some inspiration, head over to our blog, where we showcase a wide range of wall displays, from a museum exhibition to a donor wall, to an interactive wall at a retail design expo.