Build An Interactive Projection Mapping Installation

Create interactive projection mapping installations with the Interactive Wall Kit
Projection mapping, also known as video mapping or spatial augmented reality, allows you to make your surroundings come alive. It involves taking a video, animation, images, or any other visual material and project them onto a surface or objects to provide context or information or create an immersive experience. In the simplest form, projection mapping requires a computer, mapping software, a projector, and video content mapped onto a surface.
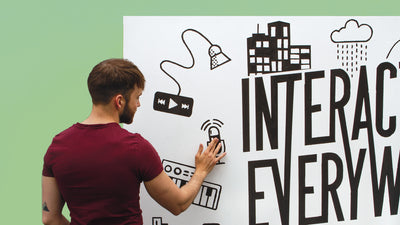
And with the Touch Board and Electric Paint, you can make projection mapping immersive! You can extend the Touch Board's twelve capacitive sensors with the Electric Paint to create points of interaction on the projection surface. Touching your Electric Paint designs sends a signal to the software and triggers an animation or video. We've seen incredible projection mapping projects on walls, floors, and even 3D objects. Electric Paint and the Touch Board make it possible to transform any surface into a stunning, interactive projection-mapped project!
In this tutorial, we explain how to set up projection mapping with the Touch Board and make an interactive wall. We use the tools that come with the Interactive Wall Kit and use MadMapper as the mapping software, but you can use other mapping software that can take MIDI signals as inputs. You can download a trial version for MadMapper from the MadMapper website.
For projection mapping to be most effective, you need to choose a bright projector. If you have a short distance between where you place the projector and where you want your projection mapping to happen, you need a short-throw projector. One of the most popular choices is the Epson 1060 projector, which is bright enough to work in daylight.
Many artists and advertising agencies have created projection mapping installations with our Touch Board, making their event and brand more engaging. You can find these projects in our Blog section.
The artwork concept, animation, and design was created by Sofia Aronov, you can find more of her amazing work here: www.sofiaaronov.com.
You will need:
1 x Interactive Wall Kit
Electric Paint
—
1 x PC or Laptop
Vector graphics editor, e.g. Adobe Illustrator
Vinyl and vinyl cutter
Drill
Screwdriver
Projector
Projection mapping software, e.g. MadMapper
Watch the full video
We have created a full video that walks you through all the steps, you can watch it below. For a more detailed explanation, read the instructions further down.
Build a small-scale prototype
We recommend you read and familiarise yourself with this tutorial before getting started so you understand the steps required to create a full-scale interactive installation. Once you have done so, start by creating a mock-up of your wall and testing your design with one or two sensors. This will allow you to make sure your design works, familiarise yourself with the technology, practice applying Electric Paint, and troubleshoot your sensors.
Prepare your design and apply the stencils
Before you can get started with the technology, you need to have a clear idea of what your visual assets are going to look like, including where your touch points are and what you want to project. It's important to finalize the design first, as the location, size and distance between your touch points will inform where you position your electrodes, and how to run your cables behind the wall. Each sensor can be up to 5m away from the Touch Board (the board reading the sensors's signal) and you can have a maximum distance of 10m between the two furthest sensors. You can have up to 12 touch points, but you can have more than 12 graphics.
The animations can be anything you want to project. In our example, we have short videos with a black background. Make sure to leave an empty frame at the beginning and the end of the video.
If using stencils, you can design your graphics with a vector graphics editor, for example, Adobe Illustrator. You can then use vinyl and a vinyl cutter to cut out the shapes for your graphics. We use a Silhouette Cameo to cut the stencils from vinyl.
Once your stencils are ready, apply them to the front of your wall. We projected the design onto the wall and placed the vinyls where we need them.
Attach Electrode Pads and apply Electric Paint
With your vinyl attached, you can now map where your electrodes need to be placed in order for users to interact with your touch sensors. You'll need to create a connection from the front to the back of the wall. The kit comes with 12 machine screws which should allow you to create a flush surface on your wall by creating a countersink. Simply use a 3.2mm diameter countersink bit to drill a hole where you want your touch point to be.
The Electrode Pads can be attached by screwing them onto the machine screws on the back of the wall. We recommend using two self-tapping screws to secure the Electrode Pads in place. Now you have created a connection from the front of our interactive wall to the back. All you should see from the front is the face of your machine screw.
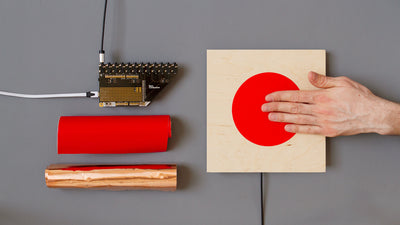
We created two proximity sensors. They are activated by touching a "hidden" part of the wall, e.g. a white circle or part of the wall that is outside the frame. For proximity sensors all you need is copper tape and then create a hatched sensor directly behind where you want the user to interact with the sensor. For a more detailed overview of proximity sensors with the Interactive Wall Kit, head over to our proximity sensor tutorial.
Next, you can apply Electric Paint to your wall. Simply paint the stencils with Electric Paint using a paintbrush, and remove the vinyl once you are happy with the results. The paint should cover and conceal the heads of the machine screws, making a connection between your graphic (the touch sensor), and the Electrode Pad in the back.
Connect the Electrode Shield and Electrode Pads
On the front of your wall, you should now see all of the sensor graphics that you created with Electric Paint. Behind your wall, you should have all the Electrode Pads positioned, and connected to the sensors on the front. Attach the Touch Board somewhere along the bottom of the wall by fixing it with three self-tapping screws. When picking a spot for the Touch Board, there are two key things to keep in mind. 1) Make sure that all your shielded cables can reach from the Touch Board to the furthest Electrode Pad. 2) Position the Touch Board somewhere that will make it easy to connect to a computer that is connected to the projector.
With the Touch Board attached to the wall, you can now connect the Electrode Shield to the Touch Board. Be gentle when doing this as you can damage the pins if they're not properly aligned.
Now you should have your Touch Board and all Electrode Pads connected to the wall and are ready to connect the board and the pads. But before you start connecting, it's useful at this point to use the cable marker set to mark each pad and shielded cable with the corresponding electrode number of the Touch Board. Your Electrode Pad comes with a white section that you can write on with sharpie. Use this spot to write the number corresponding to the electrode of the board. Next, using the cable markers, mark the cable you are using to connect an electrode to an Electrode Pad. Then, plug one end into the shield and the other into one of the Electrode Pads.
You need to make sure the cables don't shift, which you can do with the cable marking set. Tidying your cables is good practice to avoid interference and to make it easy to troubleshoot if anything goes wrong. First, coil up any cable that is just hanging loose, then add the cable management clips, which you can use to attach the shielded cables to the wall and prevent them from crossing each other too much behind the wall. A tidy set-up is when the shielded cable runs in a 90º angle from the Touch Board to the Electrode Pad.
Set up the Touch Board
With everything attached and secured, you can now connect the Touch Board to the computer that is connected to the projector.
If you haven't already learned how to reprogram your Touch Board, make sure to follow the steps here and then return to this tutorial. With the Touch Board attached to the wall, upload the "Midi_interface_generic" code to the board. You'll find it under
File→Sketchbook→Touch Board Examples→Midi_interface_generic
Make sure that you have selected the right settings for the Touch Board, including "Bare Conductive Touch Board (USB MIDI, iPad compatible)" in
Tools → Board
This code will send MIDI messages to the computer, so you need to keep the Touch Board connected to the computer.
Set up the videos in Mad Mapper
Now open your projection mapping software, we are using MadMapper. Ensure that your computer isn't mirroring its display and that the projected display is larger than the sensor. Enter the Full Screen Mode of your projection mapping software.
Drag and drop the first video into the workspace. Next, we want to scale and transform the video to fit with the sensor we painted. Pause the video and drag the play head to the start of the animation. Enter the "Full-Screen Mode" of MadMapper and then move and scale the video to your liking, checking that the images you are projecting are fitting nicely with the sensor.
Then, change the video's play settings to "Play the movie to the end of the loop and pause." Now, open the MIDI control settings in MadMapper. Select the video, then click the "Goto beginning" button, then touch the sensor on your wall. The "Goto beginning" button should now be grey and have something written across it, like "1/C2".
Exit the MIDI mode and touch the sensor again. You should see the projection mapping experience unfold! Repeat for the the other videos and animations.
If the sensors aren't working as expected, it's a good idea to visualise the sensors with our Grapher tool. Sometimes there isn't enough paint applied to the sensors so just reapply with paint. If it's not working as expected, contact us at info@bareconductive.com.
Seal the Electric Paint
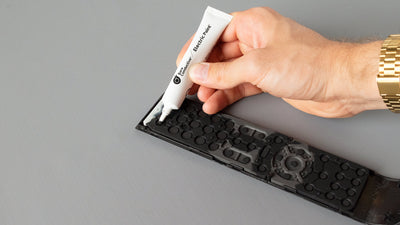
When you are happy with the sensors and they are all working as expected you can seal the paint to avoid smudging and cracking. Simply coat the Electric Paint with an acrylic varnish. You can use a brush or spray applied varnish.
Next steps
Projection mapping is not limited to a wall as a canvas. You can also use objects. The Interactive Wall Kit isn't limited to walls either. The kit works great with 3D objects too. Remember that you don't always need to drill a connection for the Interactive Wall Kit, you have more options if you are using touchless sensors, which we explain in our proximity sensors tutorial.
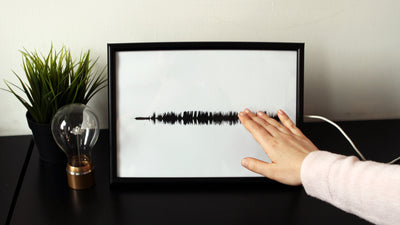
If you want to add sounds, you only need to add the sounds to the video, the projection mapping software should be able to play the sound too. If you only want to have sounds, check out our sound wall tutorial.
To take your project to the next level, you could map imagery and sound simultaneously. We've seen some fantastic interactive projection mapping projects, from retail displays to student projects to tradeshow stands. Interactive projection mapping is a unique way to give viewers a self-directed experience that you can populate with fun or informative effects.
If you run into any problems, please check out the Touch Board troubleshooting guide or contact us at info@bareconductive.com.
If you are looking for some inspiration, head over to our blog, where we showcase a wide range of wall displays, from a museum exhibition to a donor wall, to an interactive wall at a retail design expo.